How to organize your scanned documents from Genius Scan to Dropbox
Genius Scan isn’t just merely a scanning app that allows you to export your scanned documents by hand. You can save yourself some valuable time by setting up simple shortcuts to export your scanned documents to your Dropbox or set some rules to have the app export them automatically into the appropriate Dropbox folder just after you’ve scanned them.
You may be used to organizing your scanned files in a very specific way in your cloud storage (such as Dropbox) so that you can order them into more specific and appropriate folders.
Here are three ways you can export your documents from Genius Scan to Dropbox (or Google Drive or Microsoft Onedrive), from the easiest to the most complete solution.
The Basic: The One-Off Manual Export
If you want to go simple and don’t need to scan many documents that require a thorough organization, you can manually export your scans into your Dropbox.
It couldn’t be easier.
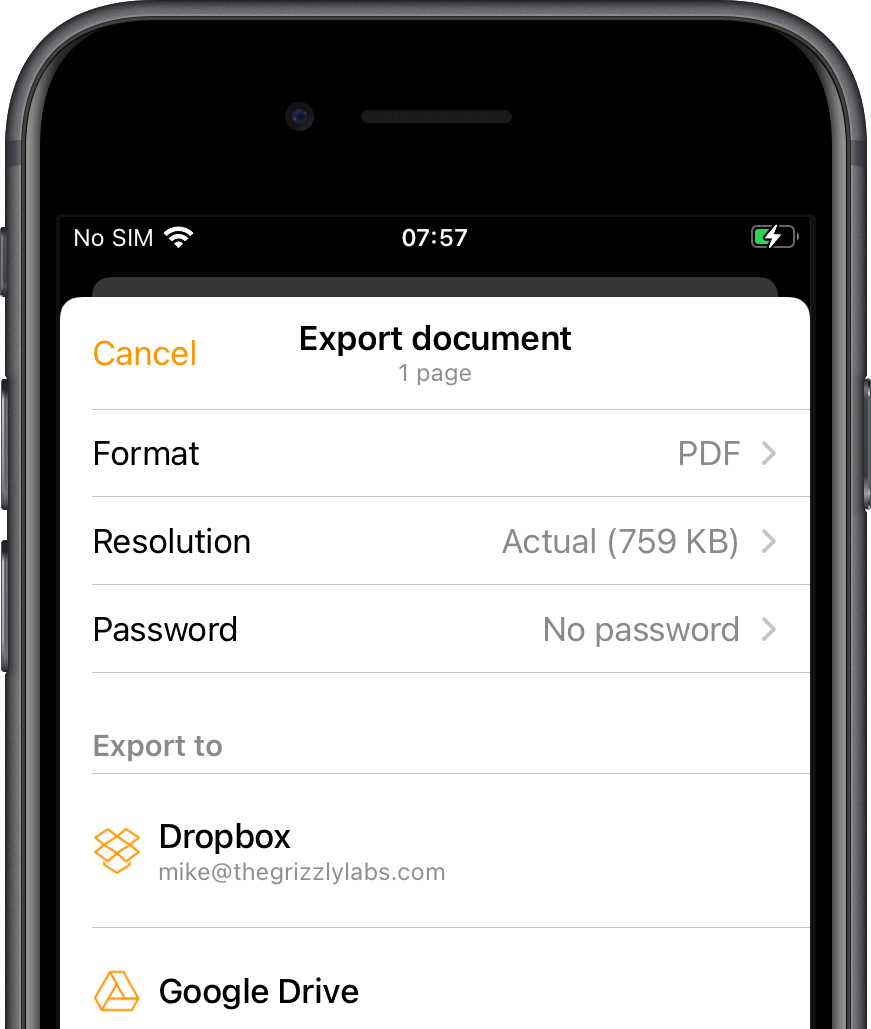
Open the Genius Scan App, scan a document or select a document that’s already been scanned:
-
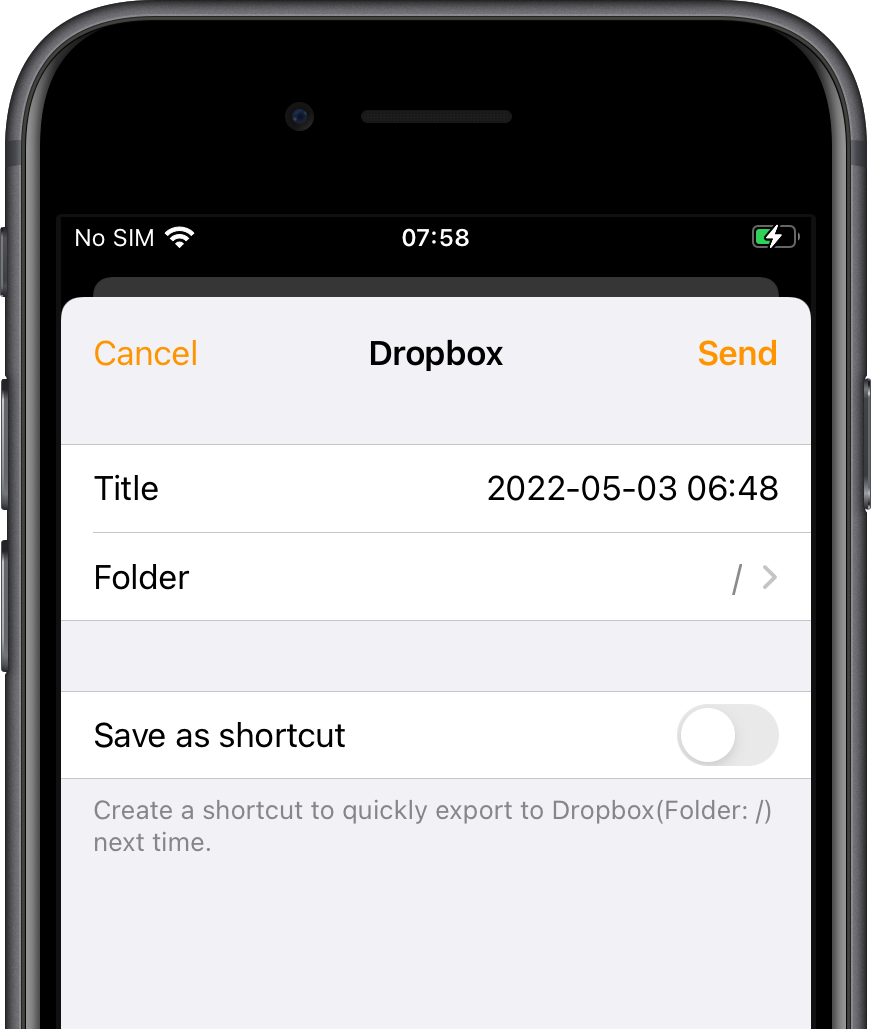
Tap Share (bottom-right corner).
-
Choose Dropbox.
-
Tap Send on the top-right corner.
While it’s a simple way for you to export your documents, and it shouldn’t take you too long, Genius Scan+ provides you with more advanced solutions when it comes to organizing your scanned documents more thoughtfully in your Dropbox.
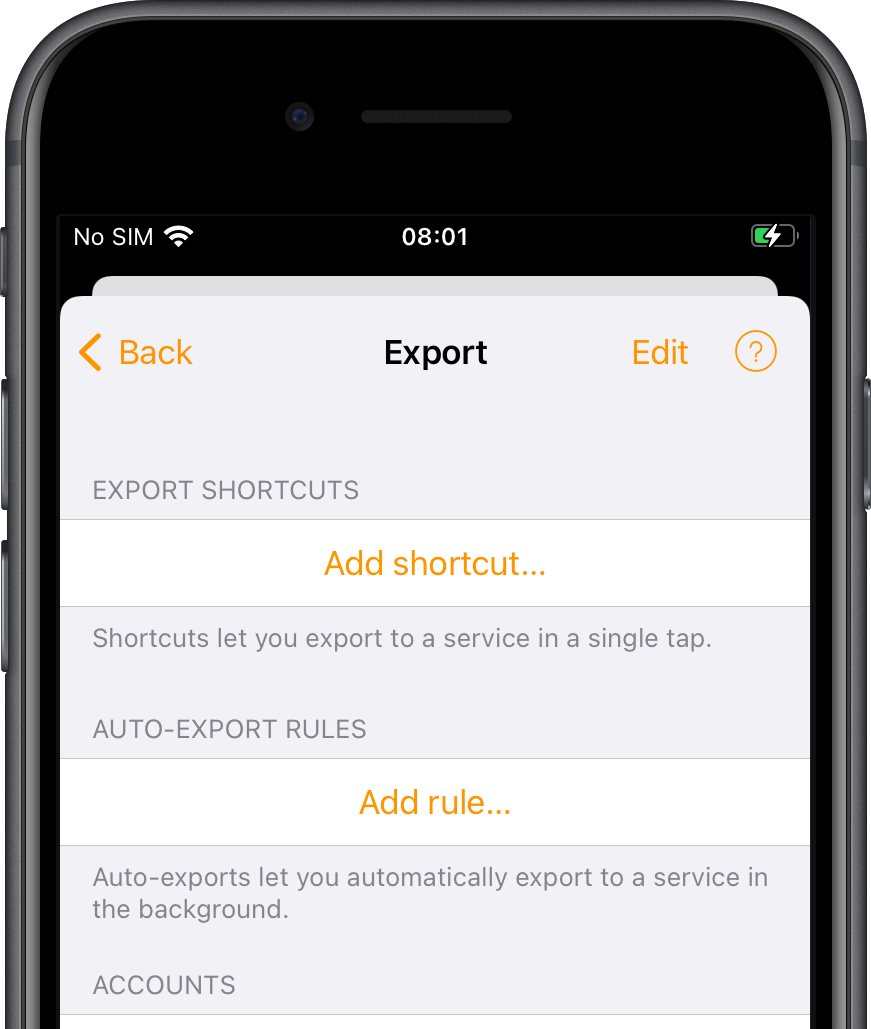
Smarter: Export Shortcuts
By configuring export shortcuts, you can export your documents to a specific Dropbox folder in a single tap, rather than having to select the folder every time you want to export them.
To add a shortcut:
-
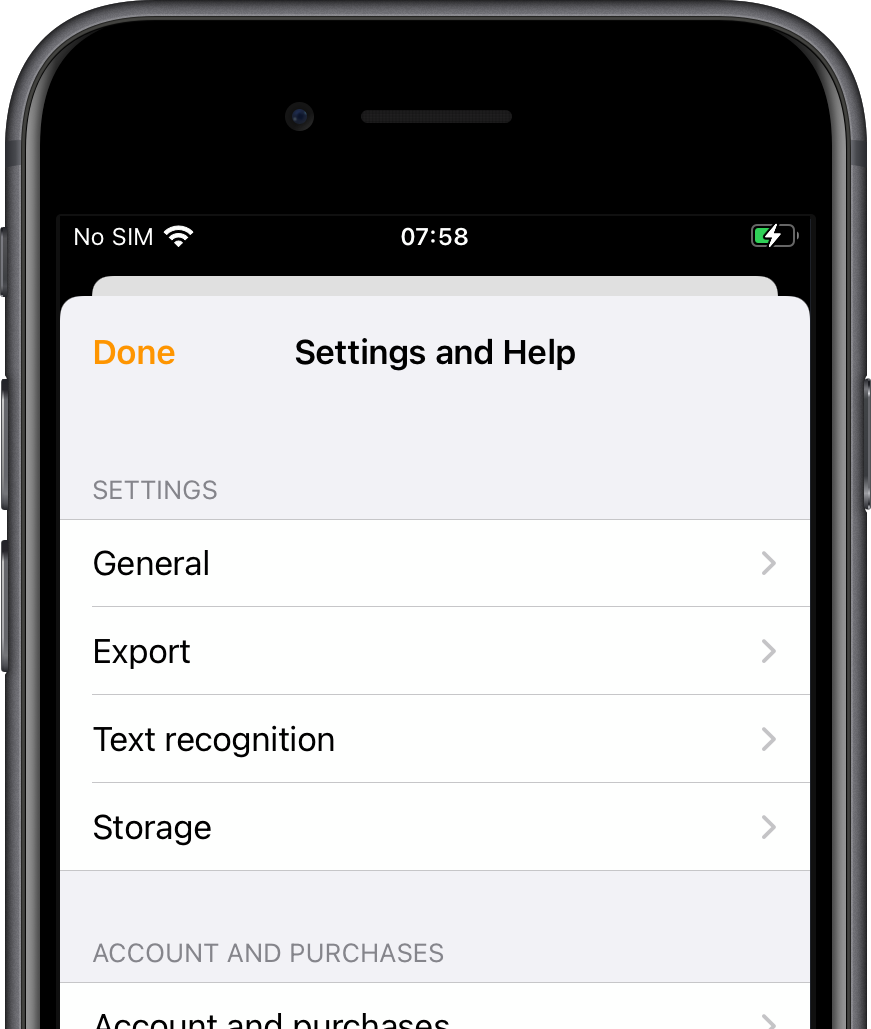
Open the Settings on Genius Scan and go to the Export Section.
-
Tap Add shortcut.

-
Select Dropbox as a destination.
-
Switch off Specify folder during export if it is toggled on.
-
Tap Folder.


-
Choose a folder then tap Select.
-
Tap Add on the top-right corner.
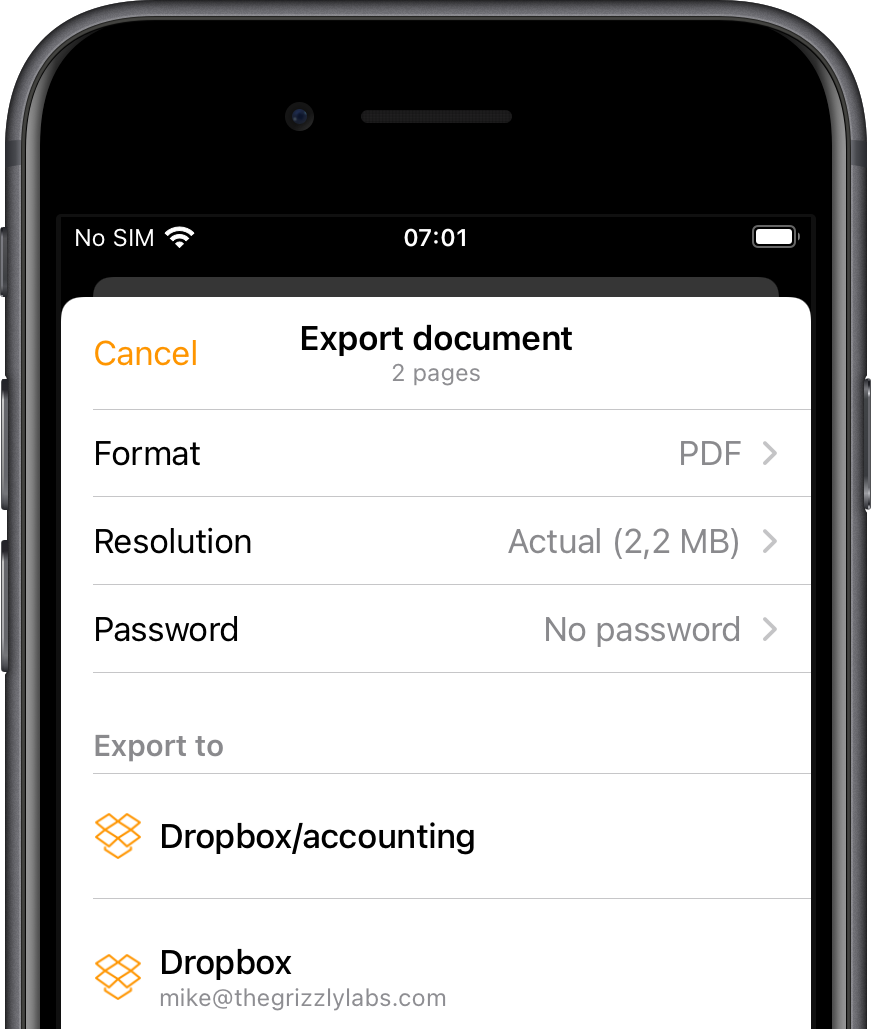
Just like me, you can name your shortcut to remember where the digitized documents go. Here, I’ve chosen to send them to my Accounting folder in Dropbox. This can be helpful if you have different shortcuts that lead to other or even the same cloud storage service.
Your shortcuts will be available at the top of the export destinations next time you export a document, enabling you to export it there in a single tap.
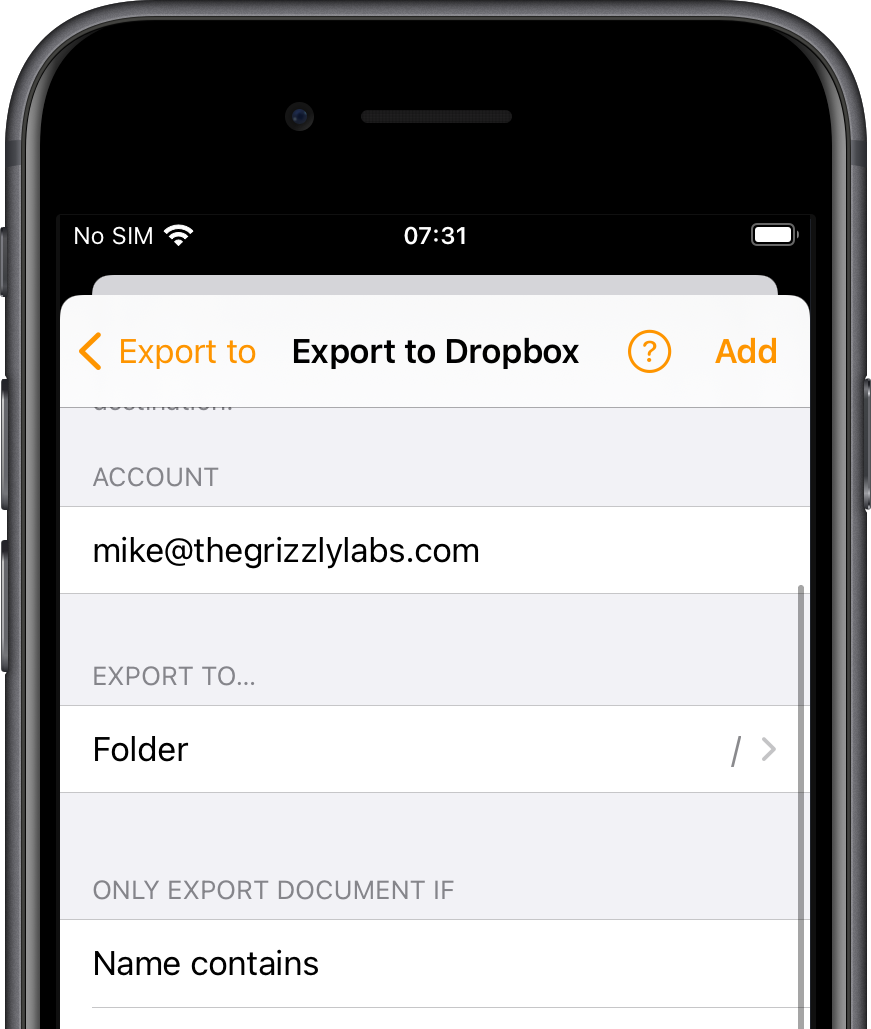
Stress-free: Auto-Export and Auto-Export Rules
With Auto-Export, you can automatically and directly send your scanned documents to the appropriate Dropbox folder as soon as they have been scanned, so you don’t have to export them manually ever again.
-
Open the Settings on Genius Scan and go to the Export Section.
-
Choose Add rule.
-
Select Dropbox as a destination.
-
Choose the folder of your choice within Dropbox.
-
Tap Add on the top-right corner.
Every document you scan will be sent to the export destination you have set up on your shortcut rule.
However, suppose you want specific kinds of documents to go into specific folders. In that case, you can set up multiple rules with conditions on the tags, and by tagging your documents as they are scanned, they will be sent directly to the appropriate folder.
To configure a rule, enter the tag that needs to match in the section Only export document if:
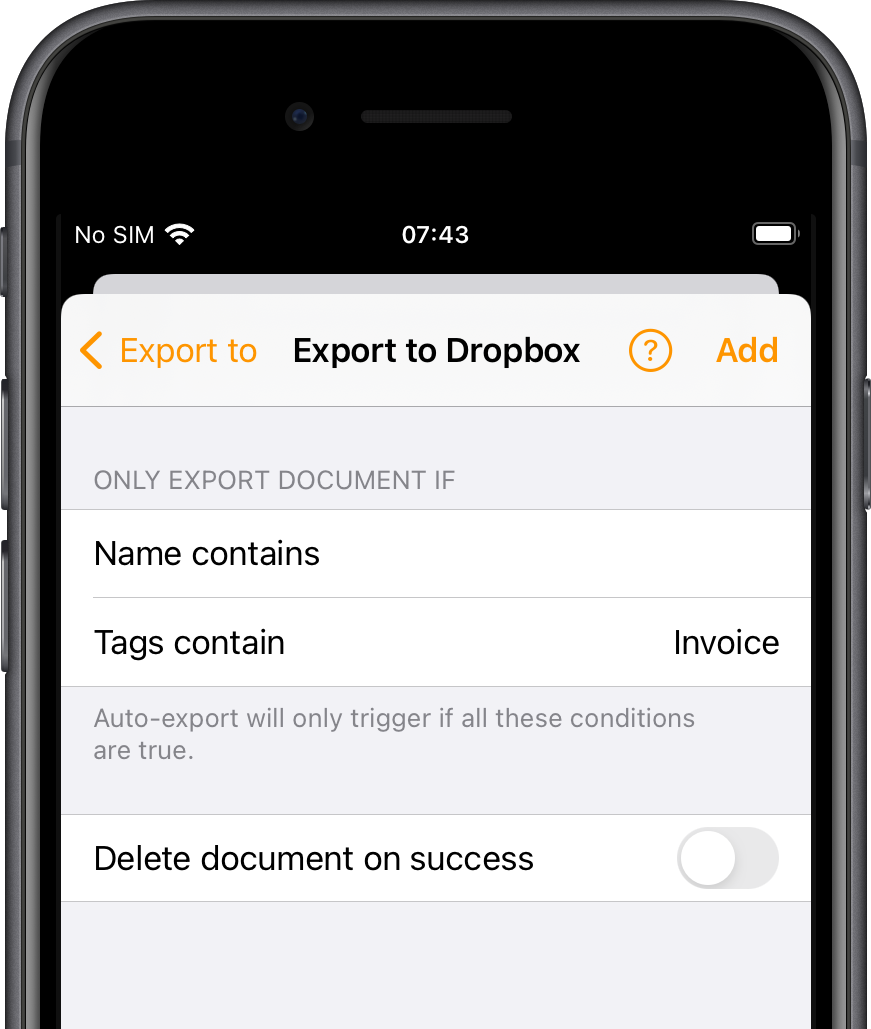
With the above configuration, if you tag your document as Invoice, it will go to your Dropbox/Invoice export destination. You could then add another rule to ensure that if you tag your document as MedicalBill, it will go to your Dropbox/MedicalBill folder.
Adding rules might take you a few minutes to set up but could save you hours of painfully organizing your scanned documents into Dropbox. Plus, it eliminates the risks of forgetting to export your documents or sorting them into the wrong folders and having to look for them in an ocean of different files.
At last, you can also decide to delete your scans as soon as they’ve been sent by validating said option in your Auto-Export rules. Just see the above screenshot. Another way to save time!
Create a Dropbox folder to share important memories with your loved ones
Organizing and archiving scans isn’t only a way for you to sort professional matters: learn how to stay in touch with your family thanks to well-organized Dropbox folders by sharing old scanned photos with your loved ones.
By the way, if you’re not into Dropbox, you can also export your documents into other cloud storage services such as Google Drive or OneDrive.