Tutorial for Genius Scan on Android
Tip: at any time, you can get see the meaning of any button in the app; do a long press on it and a tooltip will appear.
Step 1 - Open the camera
Pretty simple here, press the Camera button.
Step 2 - Take a picture
Step 2 - Take a picture
Some tips to have a quality scan :
- Make sure the whole document is included in the picture
- Tap on the screen to focus if auto-focus doesn't do a good job
- If possible, make sure to be in a bright environment
- Change the flash mode if necessary by pressing the Flash button
When you are ready, press the Camera button to capture the picture.
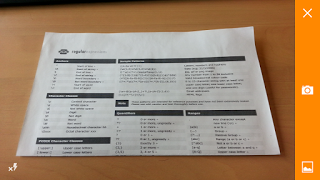
Note : If you want to import a picture from your camera gallery, press the Gallery button.
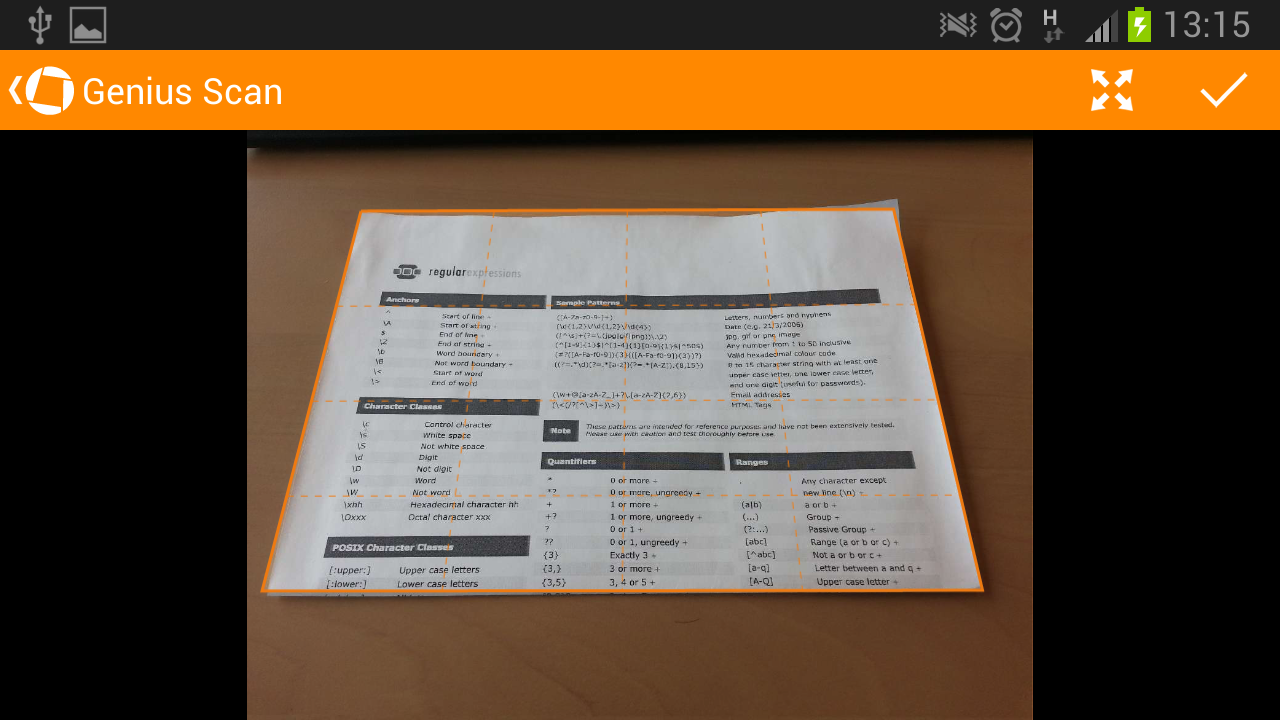
Step 3 - Select the area of interest
Genius Scan detects the borders of your document and displays as an orange grid.
You can manually rectify the corners or click on the Full page button to keep the entire picture.
- Make sure the whole document is included in the picture
- Tap on the screen to focus if auto-focus doesn't do a good job
- If possible, make sure to be in a bright environment
- Change the flash mode if necessary by pressing the Flash button
When you are ready, press the Camera button to capture the picture.

Note : If you want to import a picture from your camera gallery, press the Gallery button.
Step 3 - Select the area of interest
Genius Scan detects the borders of your document and displays as an orange grid.
You can manually rectify the corners or click on the Full page button to keep the entire picture.
Genius Scan enhances the image depending if it's mainly black and white or color.
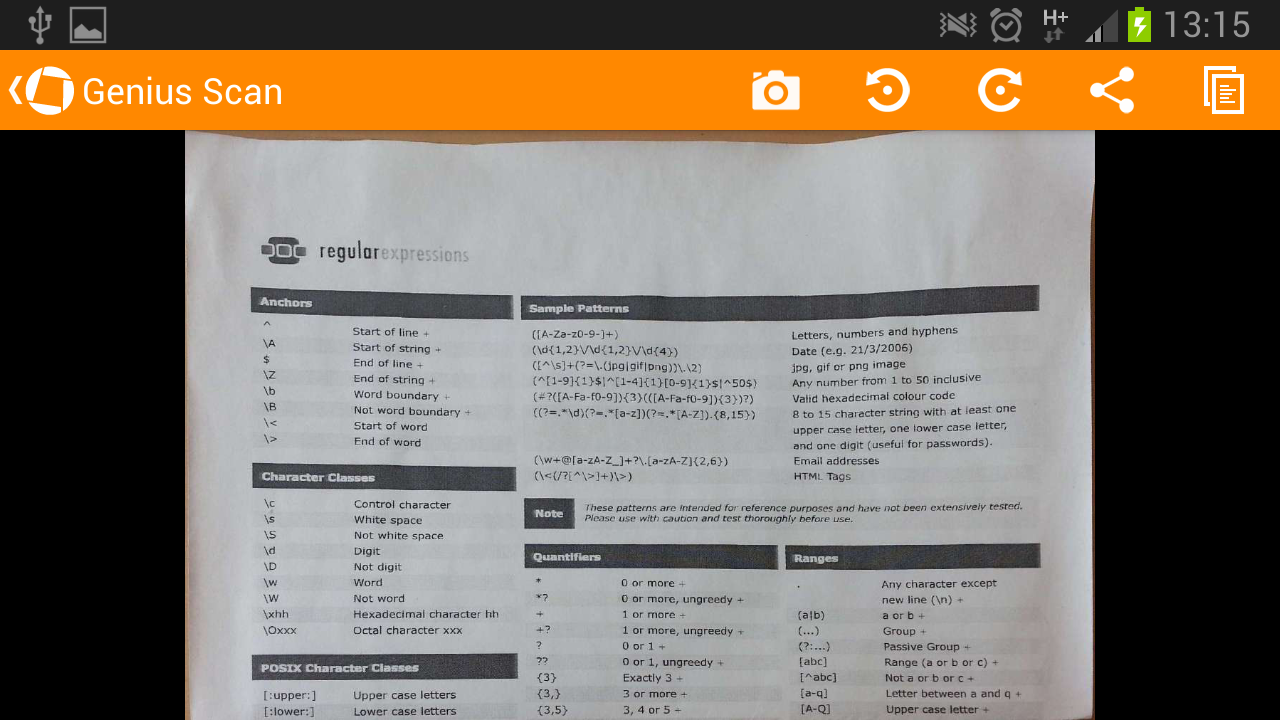
You can change the enhancement by pressing Choose Enhancement in the menu.

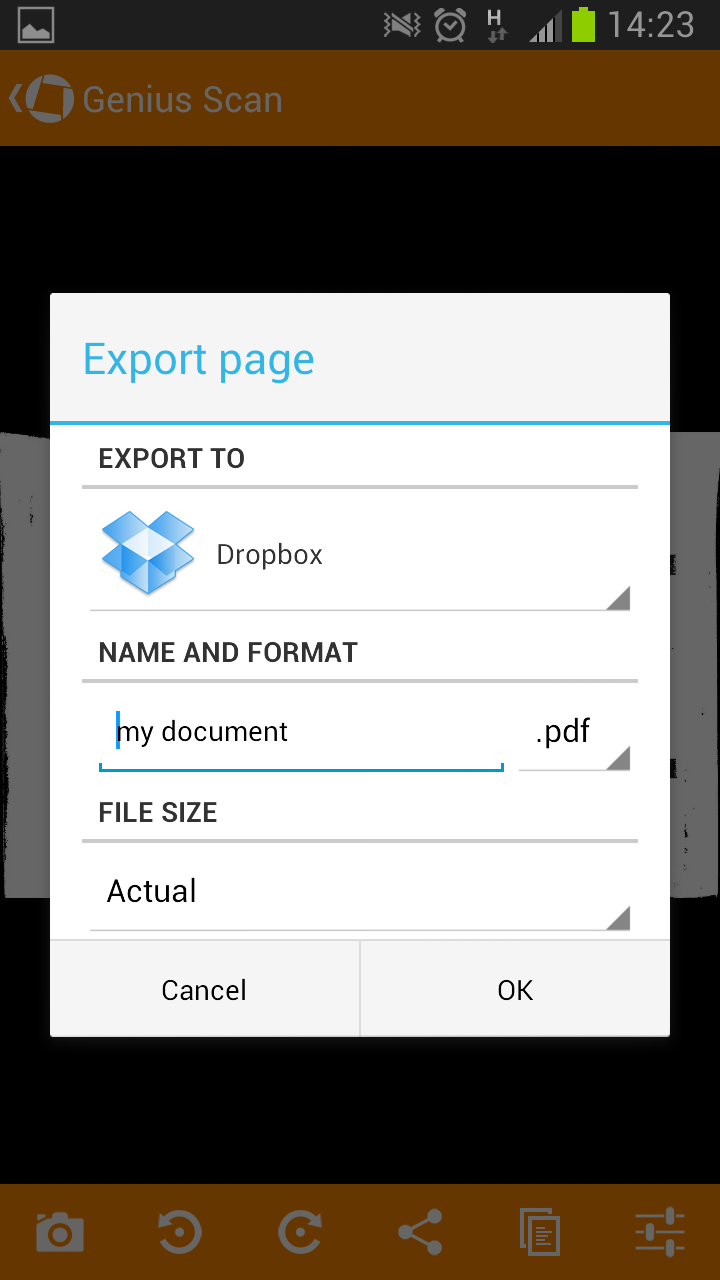
Use the Export button to export the document to another app or the Move button to create a multi-page document (See Step 6).
The export dialog allows you choose the name, format and size of your scan and the app you want to use to export it. If you want to export your scan to Gmail, Dropbox, Evernote, Expensify, Google Drive... you will need to install the corresponding app and choose it in this dialog.
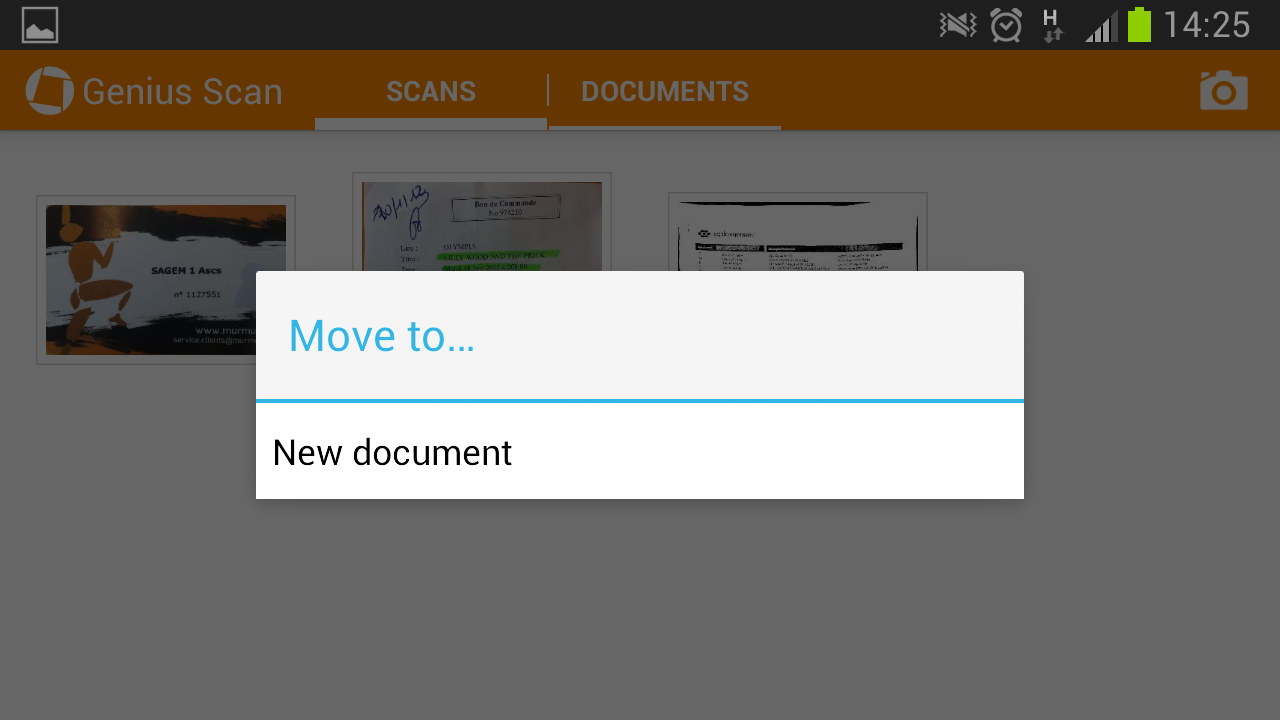
Step 6 - Create a multi-page document
Your scans are automatically saved in the Scans tab on the Home screen.
Select the scans you want to gather in a multi page document.

Press the Move button and choose New document
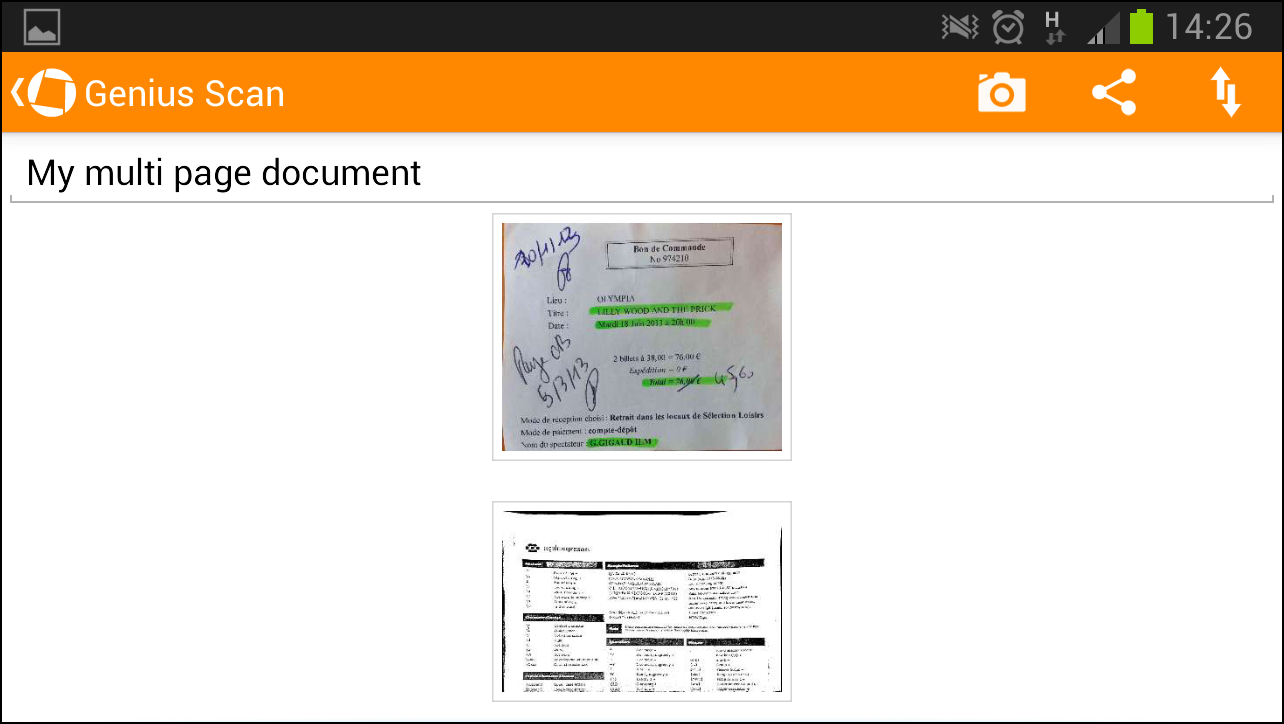
A multi-page document is created with these scans. You can reorganize pages, add other pages, export it as PDF...
Step 7 - Extra tips
If you want to save a scan/document to the SD card, install the app Send to SD card and export your scan/document to this app.
Similarly, if you want to send your scan via Bluetooth, you can install the app Bluetooh File Transfer and choose the app in the export dialog.
Remember: light is the most important factor to get quality scans, make sure you scan your documents in a bright environment.
Enjoy!